This tutorial describes very simple use case when you want to use your image or video files for projection mapping.
1. Add your source
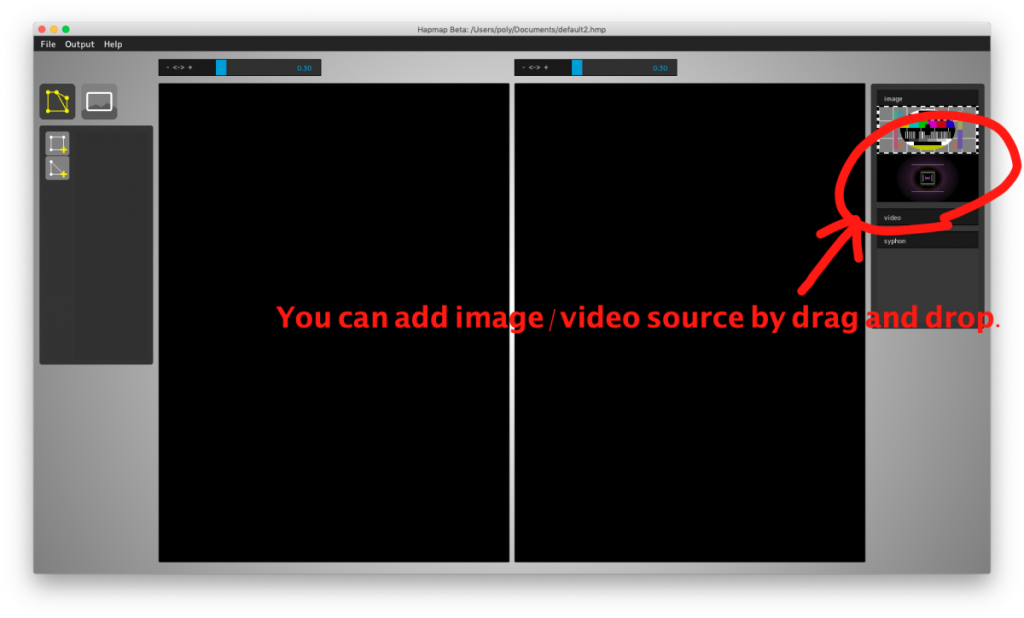
At the initial startup, you only see one test pattern image in the source list on the right side. You can add any images or videos by dragging them into anywhere in the app window.
2. Add a quad
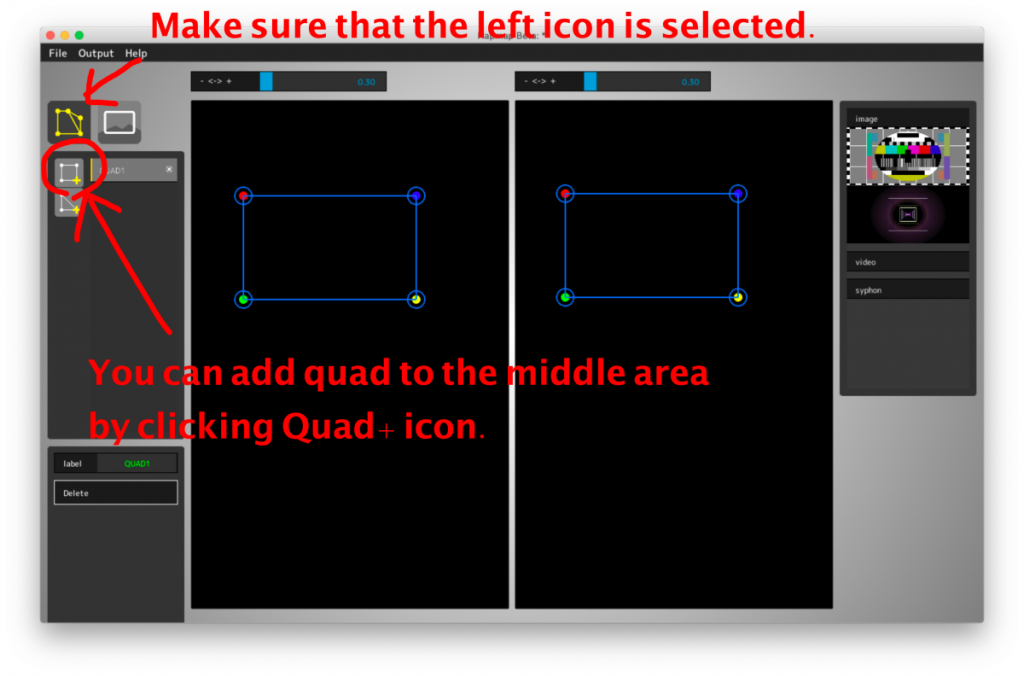
Make sure that the surface icon (the icon on the left side) is selected on the left-top side. You can add a quad to input/output preview at the middle of window by clicking quad+ icon. After adding it, you can see “QUAD1” in the surface list.
3. Assign a source
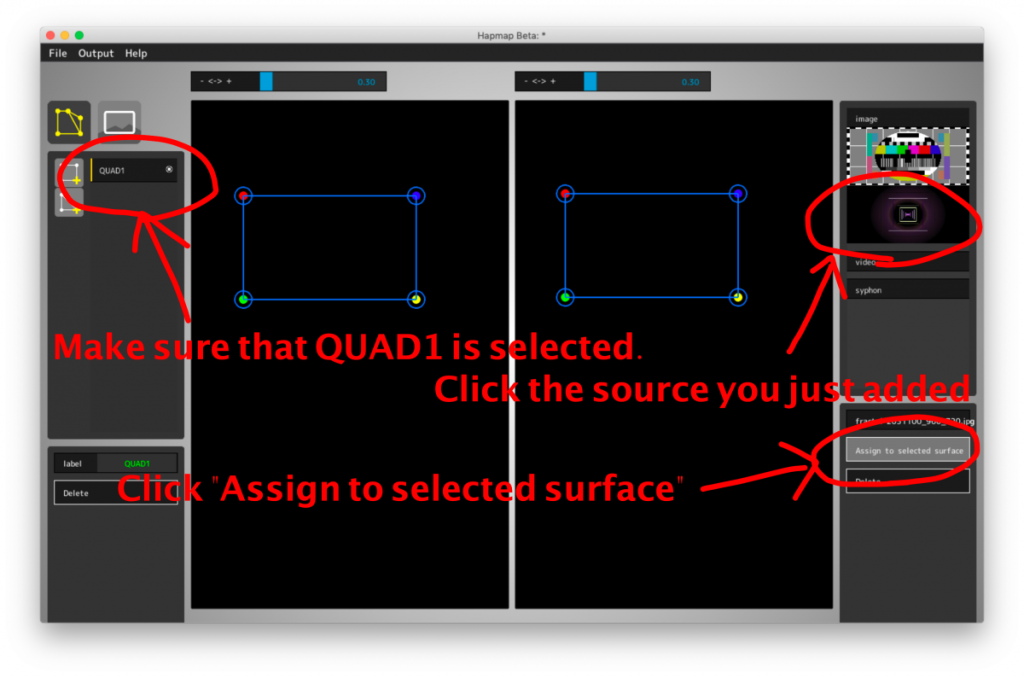
You can add any source to the quad you just created. Make sure that “QUAD1” is selected on the list, then click the target source on the right side. The control panel of the source shows up on the right-bottom, then click “Assign to selected surface” button.
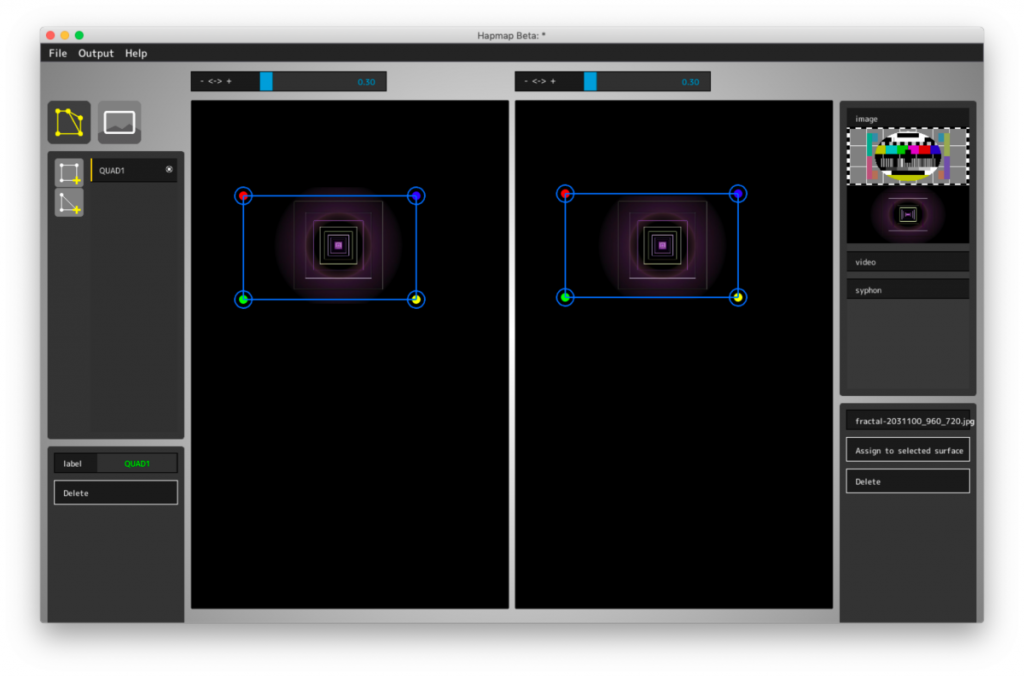
Now, you can see the source preview at the middle area.
4. Move quad and update projection
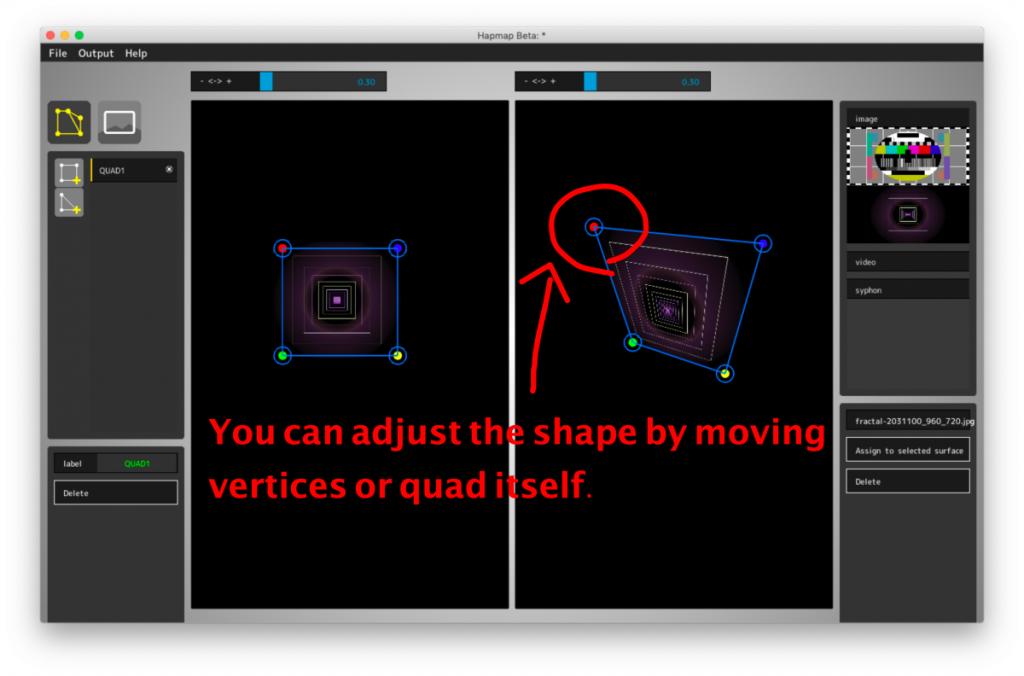
The middle-left panel is input preview and the middle-right panel is output preview of monitor/projector. You can adjust what output looks like by moving surface.
Move the vertices of quad or the quad itself by mouse so it will be correctly projected on the target surface. You can adjust as you see the external monitor/project’s full screen output (described later).
5. Preview output
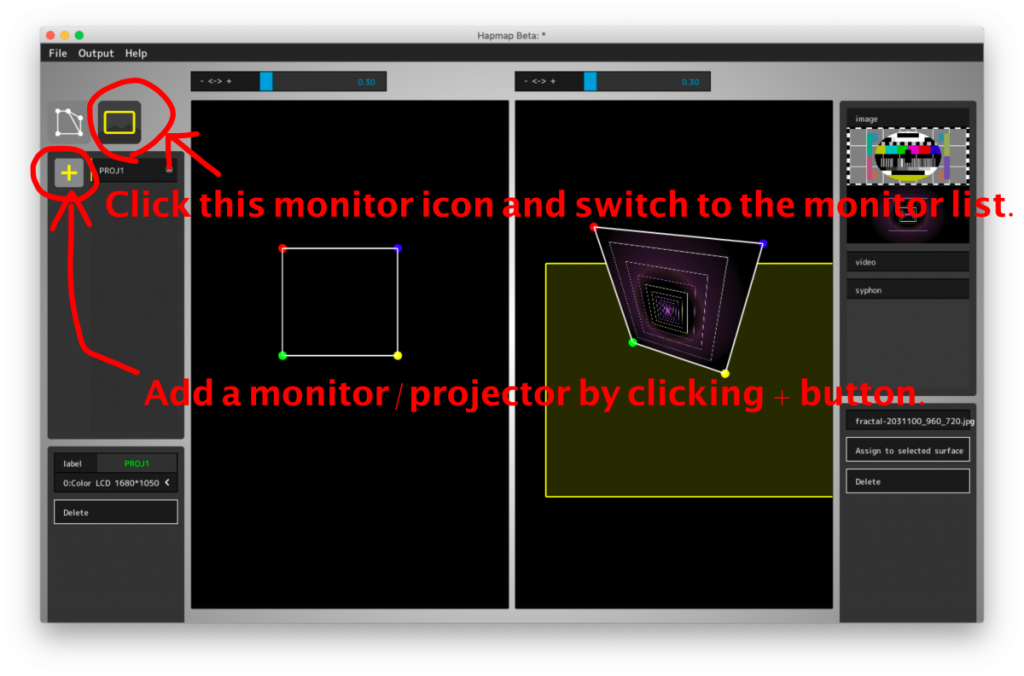
Let’s project from the actual monitor or projector. Change the list view to monitor list by clicking the monitor icon at the right of the top-right side. Then you can add a monitor by clicking “plus” icon. You can see “PROJ1” is added to the list and yellow quad is added to the middle-right panel which represents a whole monitor size.
When you have multiple external monitors or projectors, you can change its assignment by clicking “PROJ1” on the list and then select a target monitor from drop-down list on the bottom-left.
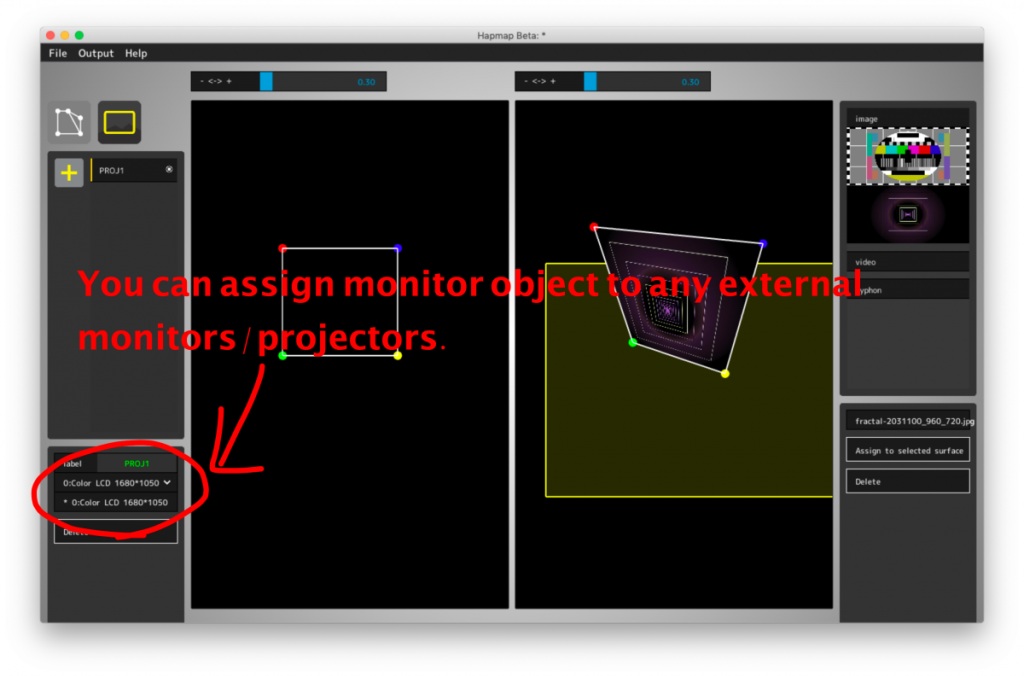
You can move a yellow monitor in the same way as quad.
If you think all positions are right, you can see the full screen output by selecting “Output” -> “Full Screen Mode” from menu bar or by “Ctrl+U” short cut. If the full screen preview hides your app, you can go back by “Ctrl+T” short cut at any time.
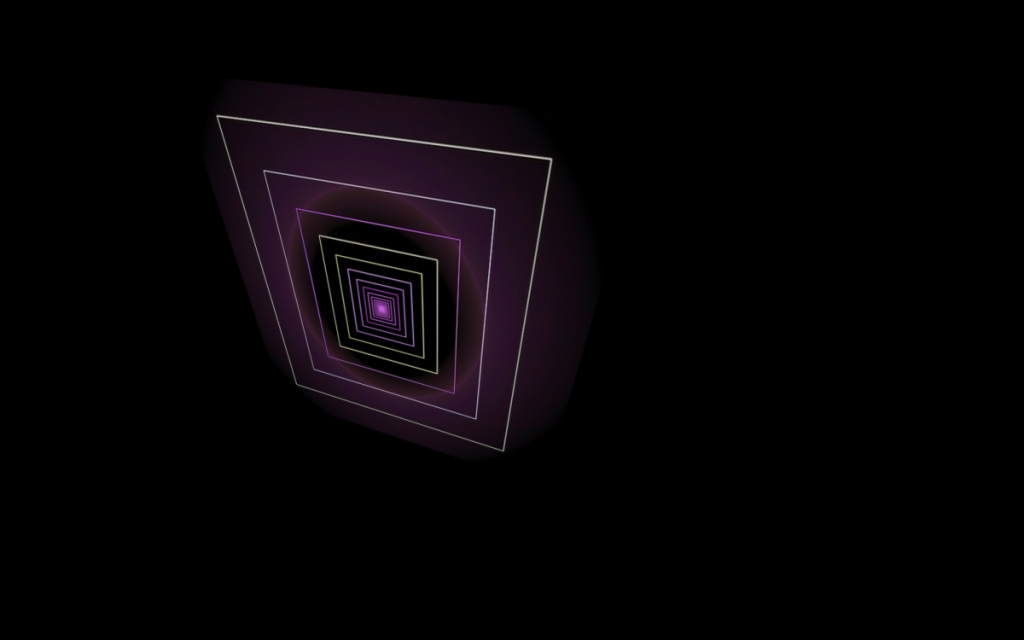
You can still change the quad position and monitor position by operating on the main window, while you see the preview on the external window. It is very convenient when you want to adjust the position while seeing the actual output.
Additional Info
You can adjust more complex shape by adding more surfaces and monitor/projectors. Also, Hapmap supports Spout or Syphon, so you can use your own application as input easily.
